How to Build a Garage Pergola to Instantly Boost Your Curb Appeal
If you’ve been staring at the front of your house thinking, “This is fine… but it could be cuter,” then girl, let me introduce you to one of my favorite DIY projects ever: the garage pergola.
We’ve been slowly updating the exterior of our house one project at a time, but this simple wooden detail over the garage door? Might be my favorite yet. It adds warmth, character, and a little visual weight to what used to be a very flat facade. Oh—and it was built with just three tools. Yep. A miter saw, a drill, and a sander.
If you’ve got a garage and a dream, this one’s for you. Let’s DIY like a mother. 💪✨
🧰 What You’ll Need
Pressure-treated pine
2x6s for brackets & bracers
2x4x10s or 2x4x12s for rafters
Pressure-treated stair balusters (cut in half) for purlins
Exterior-grade wood screws
Waterproofing stain + sealer
Tools: Miter saw, drill, sander (and optionally, a jigsaw and scroll saw if you want to get fancy with details)
Step 1: Design Your Brackets
I wanted brackets that looked chunky and charming—something that felt a little custom without going overboard. So I built mine out of pressure-treated 2x6s and 4x4s (depending on which section you're working on).
The back piece of each bracket was a 2x4 cut to 2 feet long.
The front extension is a chunk of 2x6 cut to mimic my inspiration photo.
Then I added a diagonal bracer—also a 2x6, cut at a 45° angle on both ends. I freehanded a little arch into it and cut it with a jigsaw just for a lil’ decorative moment.
You could absolutely keep this straight and simple—but if you’re feeling extra? Go for the curve. I won’t stop you. 😉
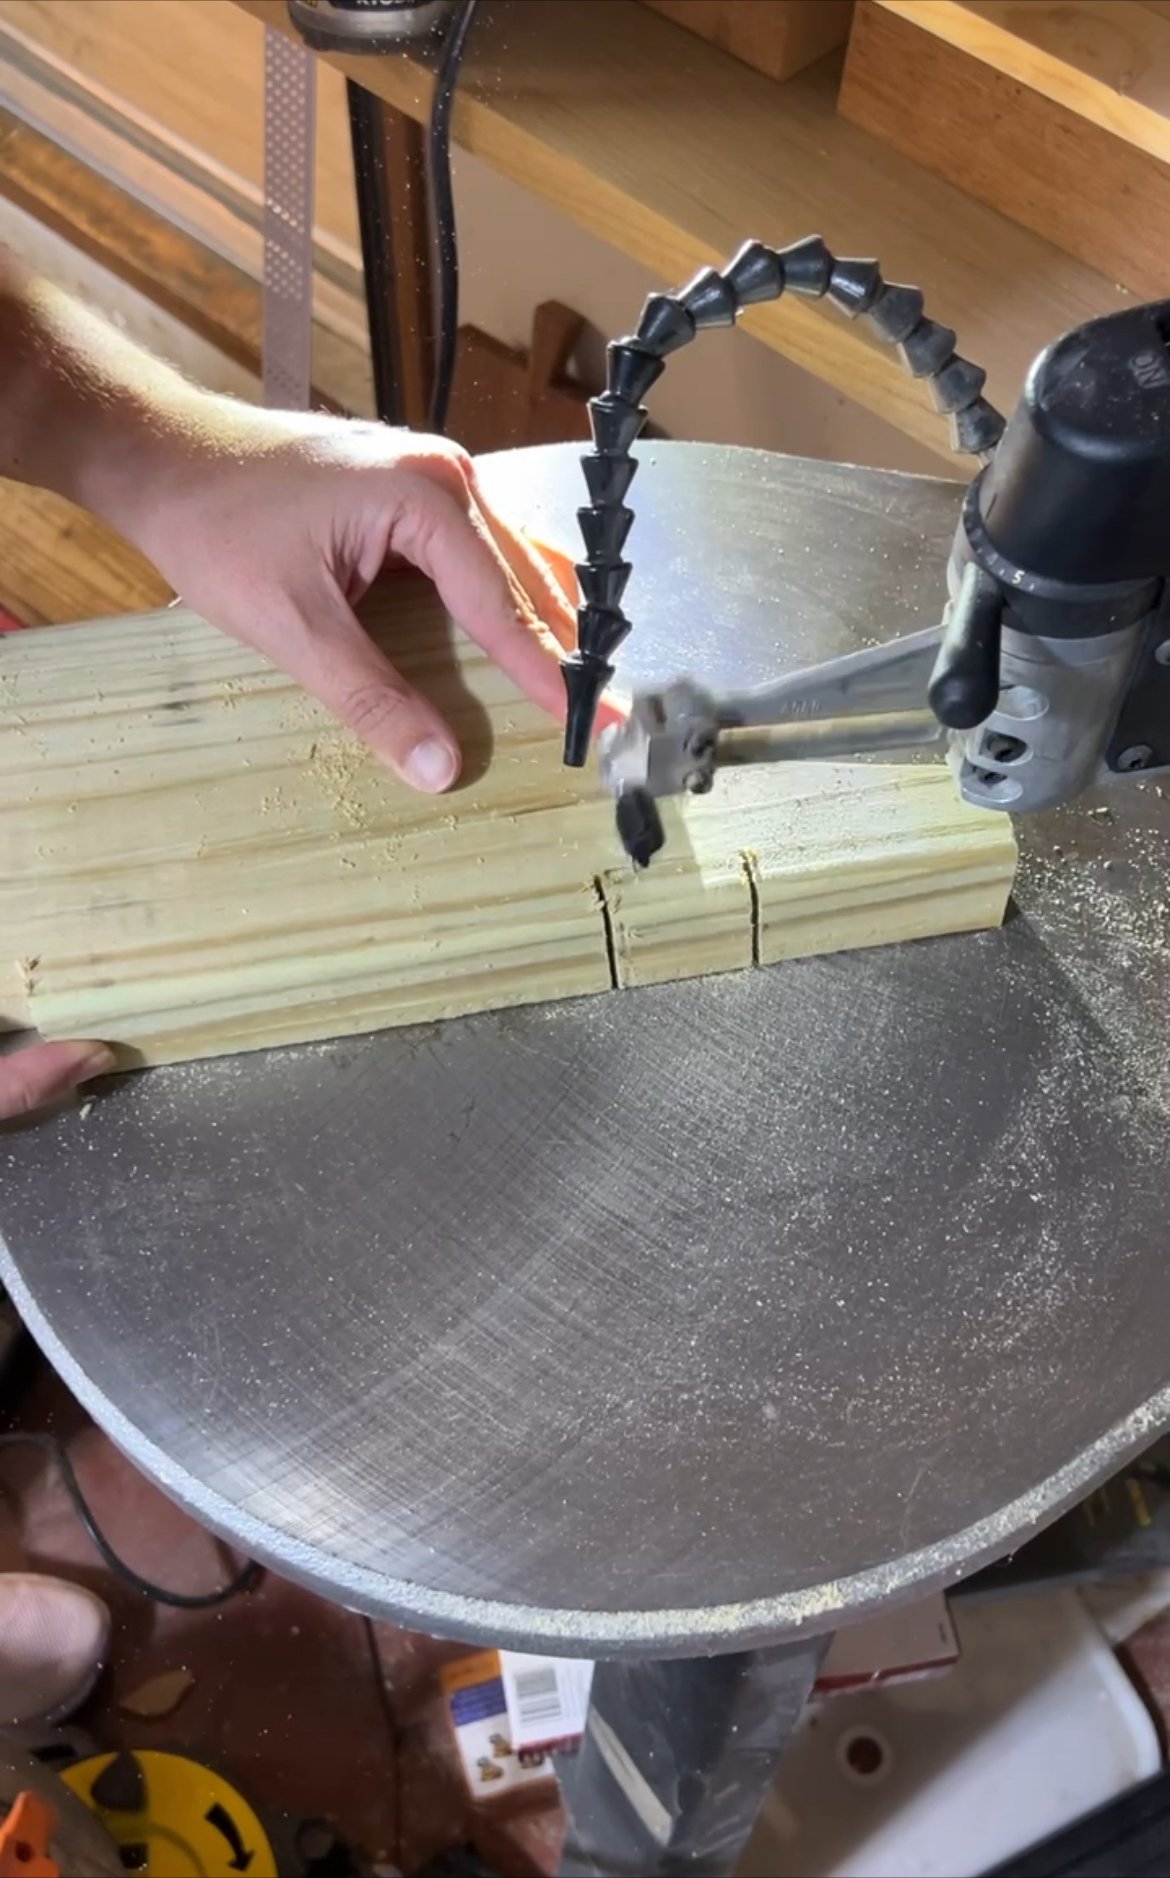
Step 2: Notch Your Brackets (Optional but Worth It)
Okay, this part was optional… and kind of a pain because I forgot to do it before assembling, but I think it helped a ton.
I added notches into the top of each bracket so the rafters could sit flush inside the bracket instead of just balancing on top. It’s more secure and gives it a polished, built-in look.
I cut those notches using a combination of a jigsaw and a scroll saw—but even just a square notch for the 2x4s will do the trick.
Step 3: Stain & Seal Your Wood
Before installing anything outside, I stained everything with a waterproofing stain and sealer. I used the same one I used on our columns and shutters, just to keep everything consistent.
You’ll want to give everything at least two coats and let it dry fully before install day.
Step 4: Install the Brackets
Now for the fun part—installing it on the house!
Instead of lag bolts, I used structural wood screws (they’re heavy-duty and easier to work with).
IMPORTANT: Screw directly into the studs behind your siding—not just into the siding itself. Siding isn’t strong enough to hold up the pergola on its own.
Use a stud finder and don’t skip this step. It’s what keeps the whole thing safe and secure.
I made two large brackets for either side of the garage, and two smaller ones above the doors themselves for extra support and symmetry.
Step 5: Add the Rafters
For the rafters, I used 2x4x10s, and secured them into the bracket notches with those same exterior wood screws. You can make them a little decorative too—I did a subtle dog ear cut at the end of each one for just a bit of charm.
💡Tip: If your garage is extra wide or your brackets are spaced far apart, go with 2x4x12s to keep the overhang balanced.
Step 6: Install the Purlins (Top Slats)
The final detail that really pulls it together? The purlins—aka those small horizontal slats that sit on top of the rafters.
I used pressure-treated stair balusters (budget win!) and cut them in half.
Pre-drill your holes to avoid splitting the wood.
Then attach them with exterior wood screws, spacing them about 5 inches apart.
A quick little update to the old garage doors (which will eventually get replaced) made them look much better:
Then I added some planters on each side of the pergola to get some start of jasmine to grow up an (eventually) along the pergola. It was just the finishing touch that the garage area needed.
Final Cost Breakdown
You ready for this?
Lumber, hardware, stain, and everything else came out to around $515—including tools.
And y’all… that’s cheaper than most light fixtures. And this one upgrades your whole house.
Take a look at the instagram post below for the total cost breakdown for the curbside appeal project we tackled two years ago:
Quick Recap: Tools Needed
✔️ Miter Saw
✔️ Drill
✔️ Sander
(Optional: Jigsaw + scroll saw for details)
That’s it. You don’t need a workshop. You don’t need a contractor. You just need a weekend, a vision, and maybe a little extra muscle on install day. Below is the pergola that my Brother and Sister-in-Law commissioned me to build at their house. They were a HUGE help and we got everything done SUPER quickly! And it was all done with just a drill, a
Wanna Try It? You Totally Can.
This is one of those projects that looks complicated, but really comes together with a few thoughtful steps and some weekend hustle. It’s beginner-friendly, budget-conscious, and makes a huge impact on your home’s curb appeal.
So if your garage is looking a little… flat?
Grab your drill and let’s do this.
And when you build yours?
Tag me—I’m dying to see it.
Want more weekend-friendly DIYs that make your home actually work for your family?


